Effortlessly Migrate Your AKS Clusters to Azure Container Storage Using CloudCasa
Overview
Azure Container Storage is a cloud-based volume management, deployment, and orchestration service built natively for containers. It integrates with Kubernetes, allowing you to dynamically and automatically provision persistent volumes to store data for stateful applications running on Kubernetes clusters.
With the addition of Microsoft Azure Container Storage (ACStor) as an available storage for Microsoft AKS (Azure Kubernetes Service) clusters, users may now be inclined to migrate their current Kubernetes clusters to make use of this storage offering to help further simplify their AKS deployments.
In this tutorial you will learn how to:
- Install CloudCasa on Azure Kubernetes Service clusters
- Configure your AKS clusters to make use of Azure Container Storage
- Use CloudCasa as the migration vehicle for migrating your cluster to configure with Azure Container Storage.
Registering Microsoft Cloud Accounts in CloudCasa
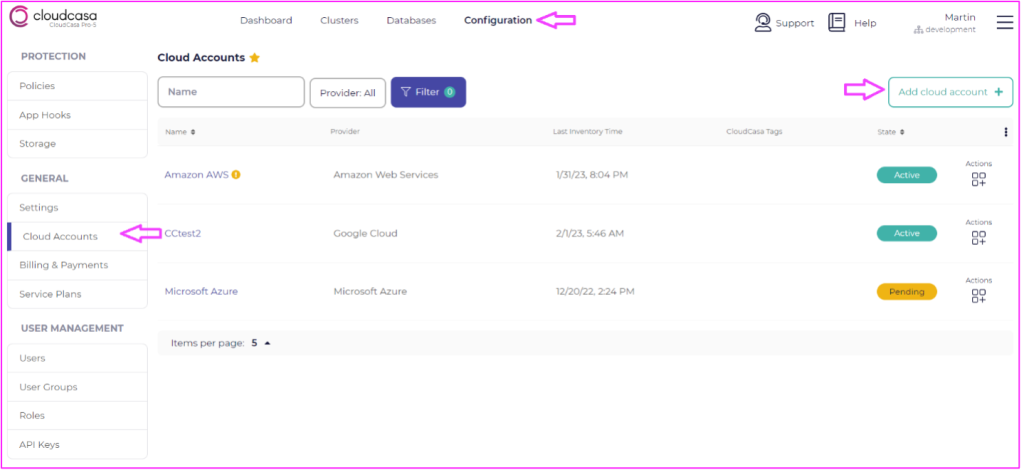
In the first step, you will need to add a Microsoft Cloud Account into CloudCasa profile. If you haven’t already done so, you will need to create a CloudCasa account profile at https://cloudcasa.io.Step 1: Add a new cloud account to CloudCasa
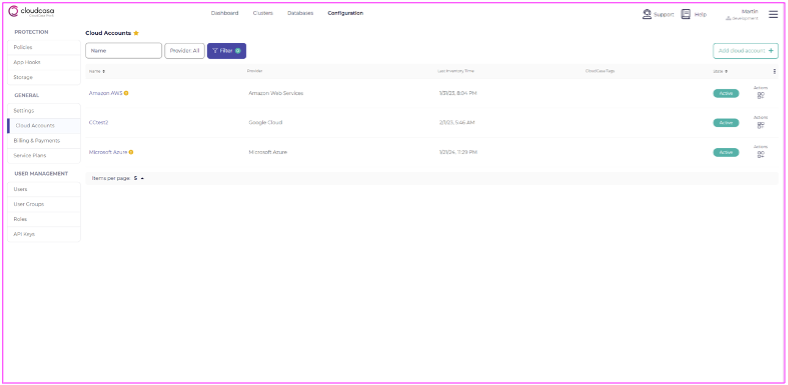
From the Configuration > Cloud Accounts menu, click on the Add Cloud account button.
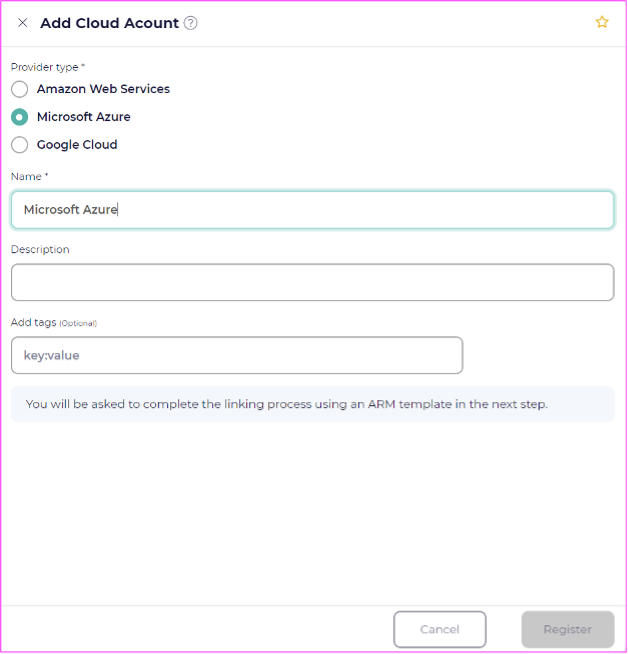
Step 2: Select Microsoft Azure as the cloud account type
In the “Add Cloud Account” menu, select Microsoft Azure as the cloud account services.
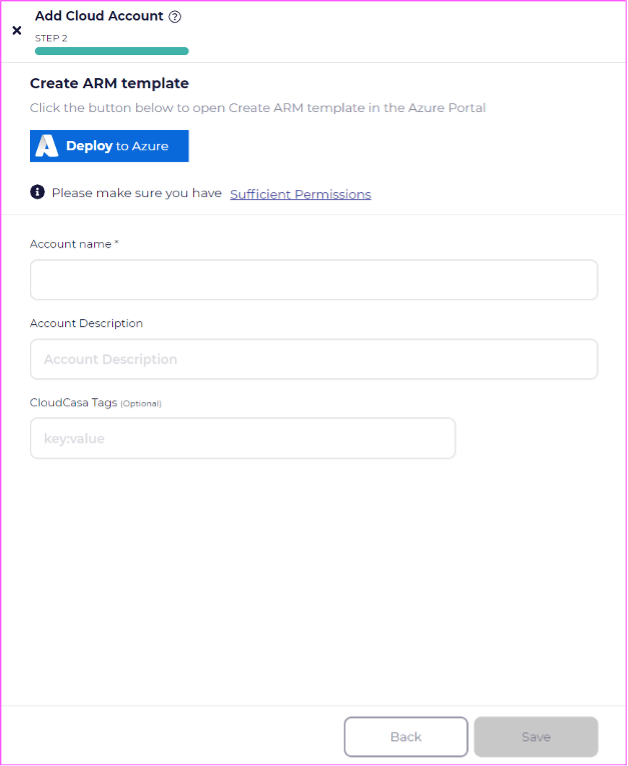
Step 3: Deploy the CloudCasa ARM template to your Azure cloud account
Click the “Deploy to Azure” link. This will take you to the Create ARM Template (Azure Resource Manager) wizard. Click the Deploy to Azure button.
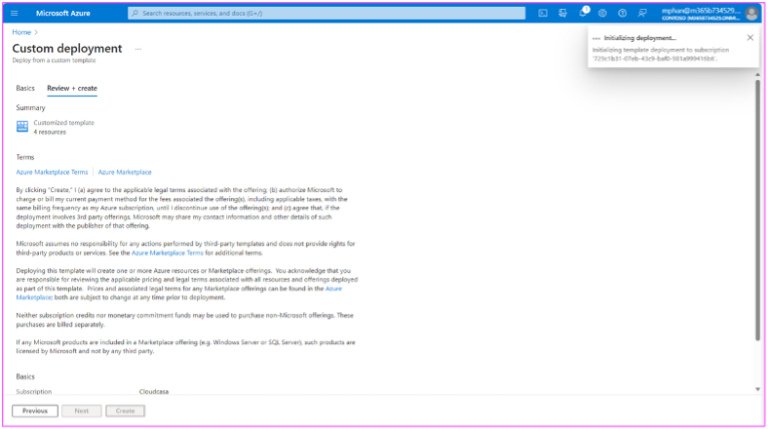
Step 4: Follow the custom deployment wizard
The link will take you to the Create Template wizard within the Microsoft Azure portal. It is here where you can deploy our custom template, by providing this information when configuring the template:
Subscription: CloudCasa
Region: <select applicable region>
You can leave the default options listed in the template. Click the “Review + Create” button.

Step 5: Create the CloudCasa application from the custom template
After clicking on the Review + Create Button, you will be provided with a description of the CloudCasa custom template along with end user terms of agreement. Agree to the Azure MarketPlace Terms and click the Create button within this screen.
Verifying CloudCasa Connectivity with Azure
After deploying the custom template through the Azure Resource Manager template screen, you will see your Account be marked as “Active”. In the CloudCasa management console, you can provide your Cloud Account with a Name and Description as shown in the example screenshot below.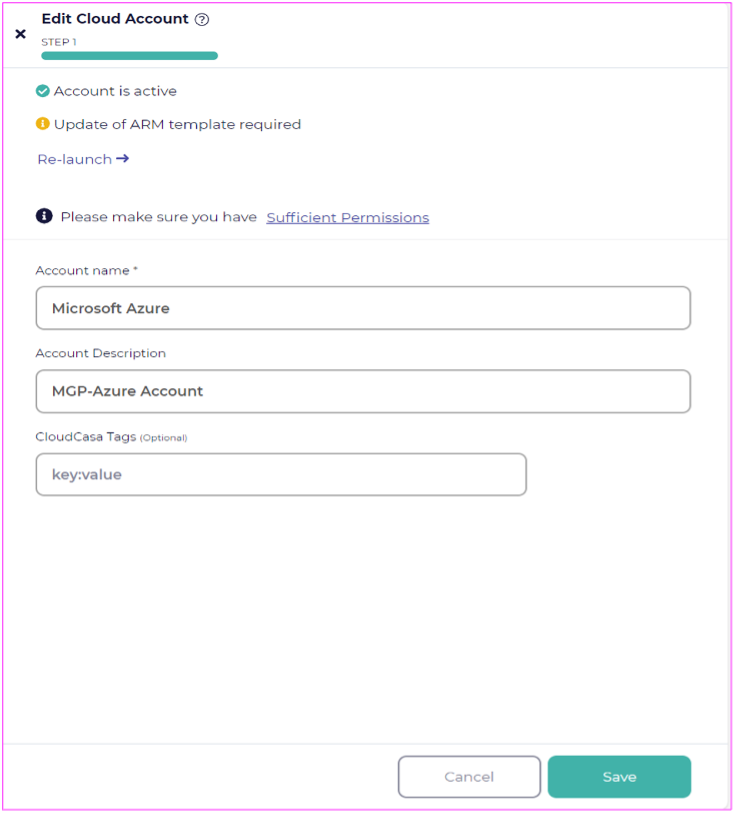

Migration of Storage Classes to Azure Container Storage
Introduction
In order to move to Azure Container Storage, you will need to create a new standby cluster and configure the destination cluster to make use of the Azure Container Storage storage class. In our example, below, we have used a cluster with Kubernetes cluster with node sizes of “Standard_D4s_v5” with Azure Disk as our backend storage for the Azure Container Storage information.
If you would like to use other backing storage like Elastic SAN or Ephemeral Disks, you need to make sure that your clusters are set with the proper VM types and/or have followed other steps as documented by the additional Microsoft Resource Links provided in the reference links below.
Useful Microsoft Reference Links
Additional requirement for Elastic SAN: https://learn.microsoft.com/en-us/azure/storage/container-storage/install-container-storage-aks?tabs=portal#assign-azure-container-storage-operator-role-to-aks-managed-identity
Configure Your Cluster with Azure Container Storage (ACStor)
Step 1: Update Node Pool
Update the node pool label to associate the node pool with the correct IO engine for Azure Container Storage.
az k8s-extension create –cluster-type managedClusters –cluster-name –resource-group –name –extension-type microsoft.azurecontainerstorage –scope cluster –release-train stable –release-namespace acstor
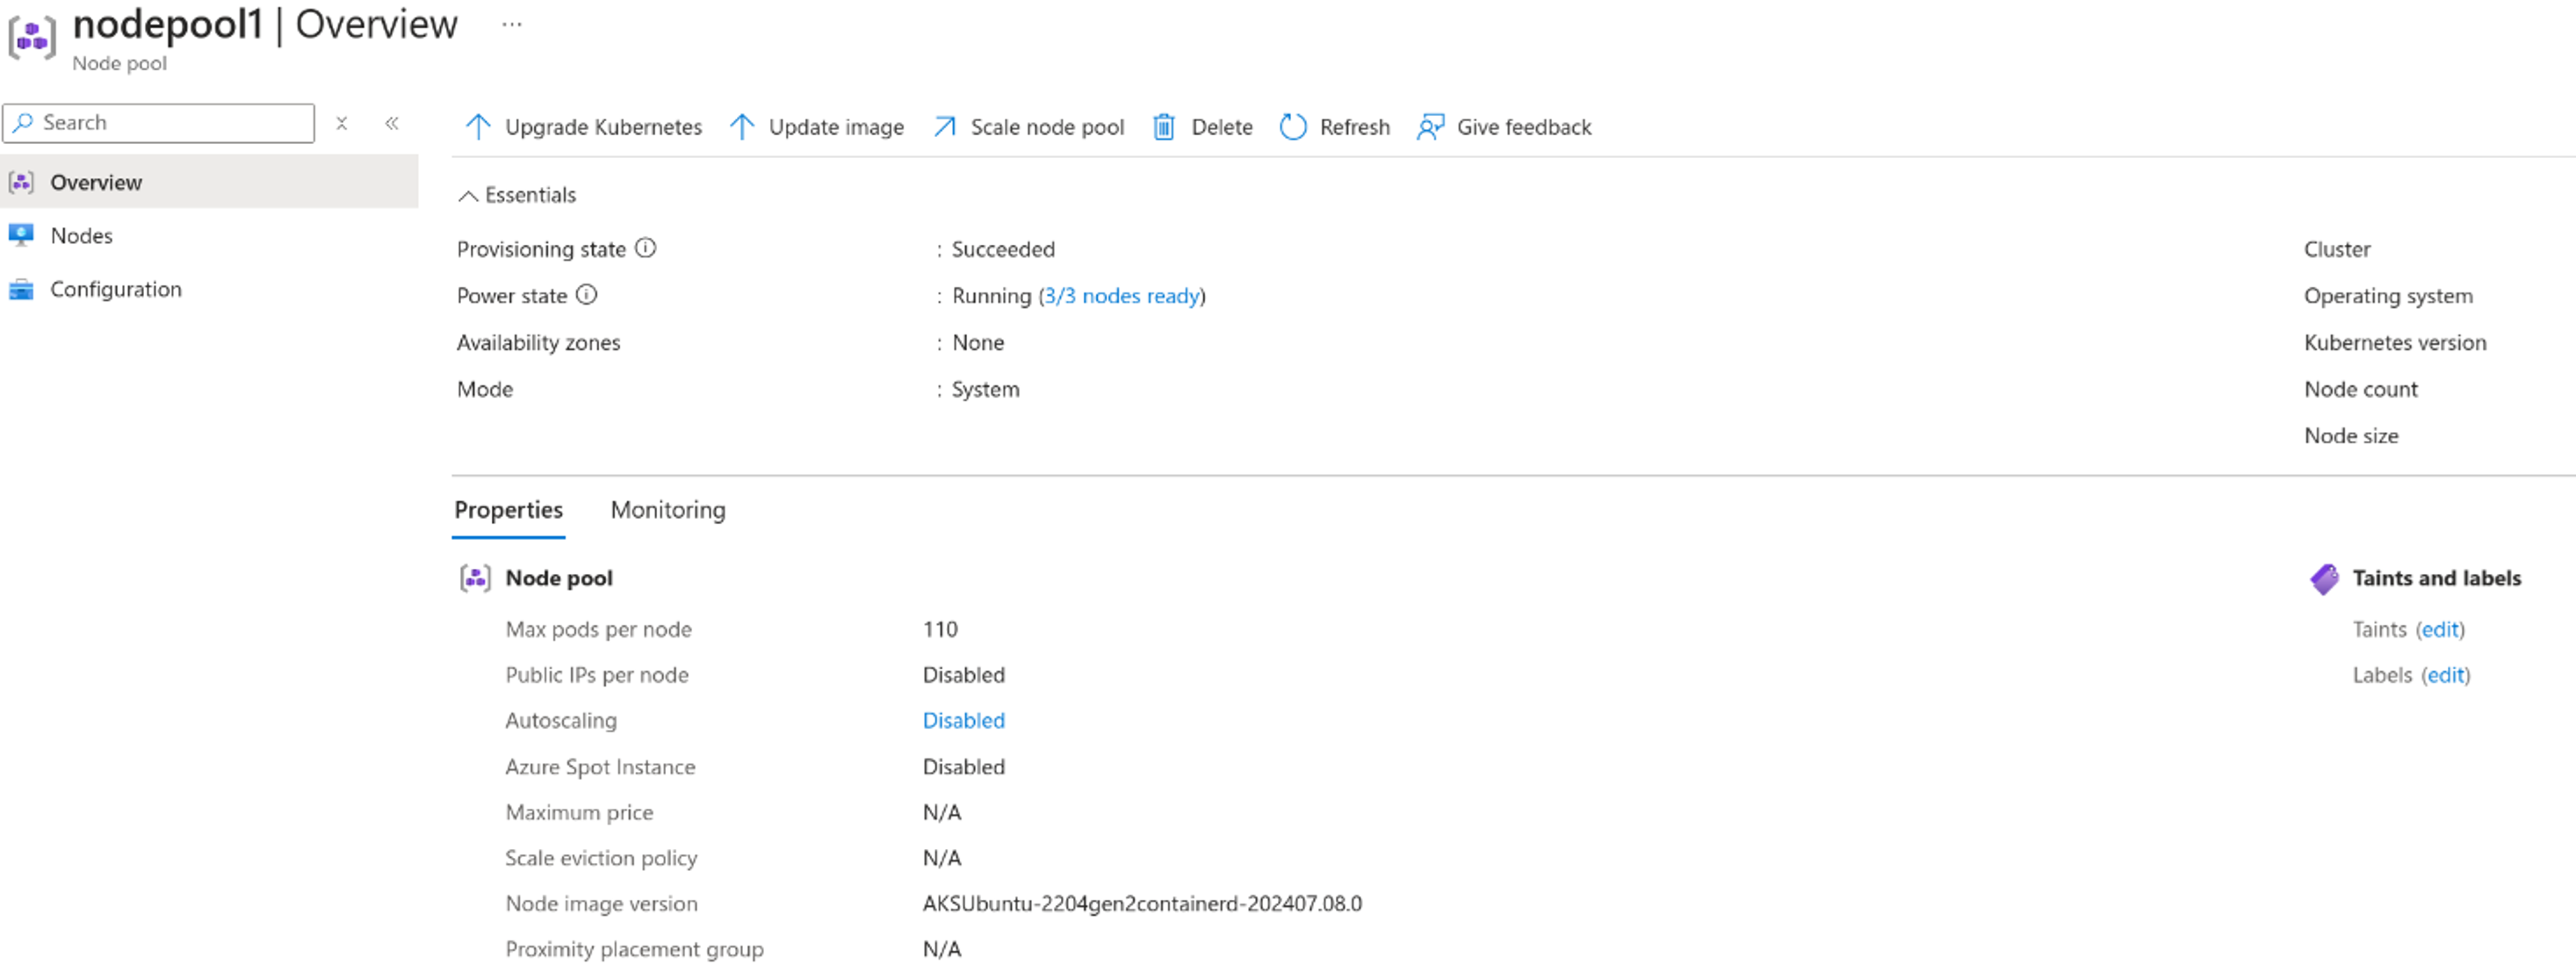
Step 2: Verify Node Pools configured properly
Verify that node pools have been labeled properly. Go to Settings -> Node Pools, select the node pool, and check “Labels“ under ”Taints and labels“:
Step 3: Install the Azure Storage Container
Install the Azure Storage Container to your new cluster
az k8s-extension create --cluster-type managedClusters --cluster-name --resource-group --name --extension-type microsoft.azurecontainerstorage --scope cluster --release-train stable --release-namespace acstor
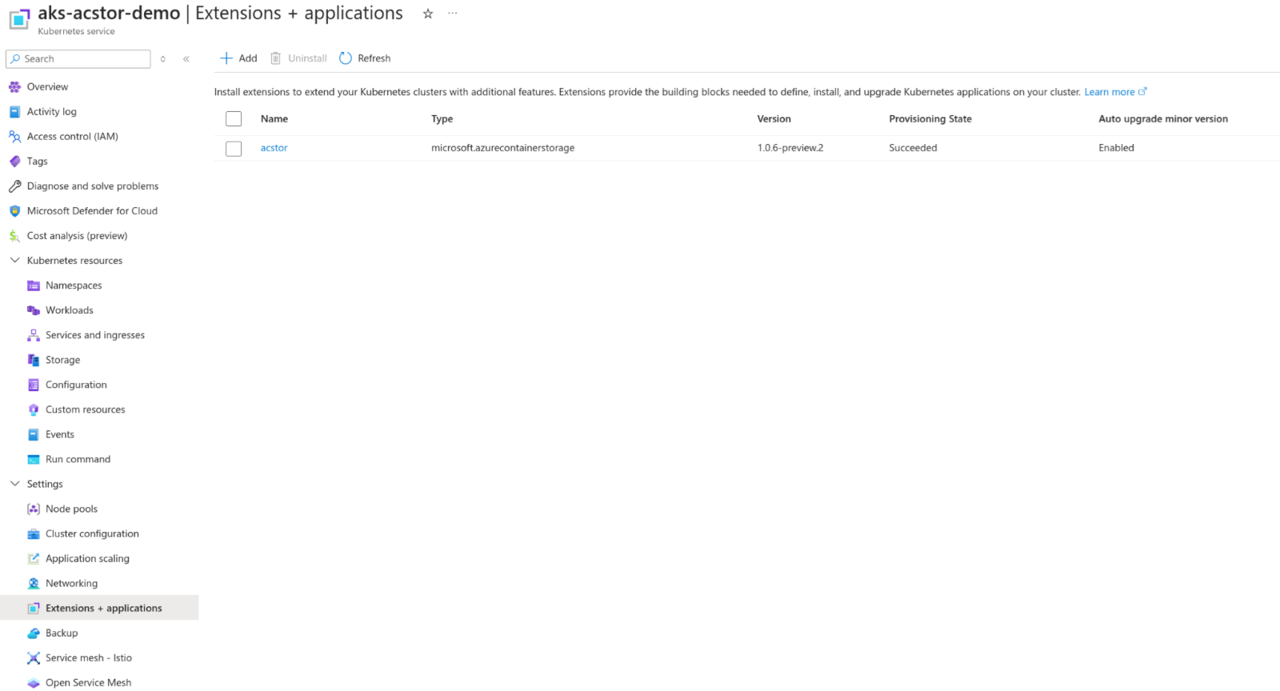
Verify that Azure Container Storage has been installed properly. Make sure all pods in the acstor namespace are Running and there is an entry for Azure Container Storage in the Azure Portal under Settings -> Extensions + applications
| NAME | READY | STATUS | RESTARTS | AGE |
| acstor-agent-core-78855dff9c-688tn | 2/2 | Running | 0 | 8m30s |
| acstor-agent-core-78855dff9c-cbf7m | 2/2 | Running | 0 | 8m30s |
| acstor-api-rest-864698d9db-whpgl | 1/1 | Running | 0 | 8m30s |
| acstor-arc-logs-28s4r | 3/3 | Running | 0 | 8m31s |
| acstor-arc-logs-k6nvt | 3/3 | Running | 0 | 8m31s |
| acstor-arc-logs-q7q5l | 3/3 | Running | 0 | 8m31s |
| acstor-arc-metrics-ccd6c69b-bfnjq | 3/3 | Running | 0 | 8m30s |
| acstor-azuresan-csi-driver-29274 | 6/6 | Running | 0 | 8m30s |
| acstor-azuresan-csi-driver-9jzz9 | 6/6 | Running | 0 | 8m30s |
| acstor-azuresan-csi-driver-jsk4x | 6/6 | Running | 0 | 8m30s |
| acstor-capacity-provisioner-5c97b6744d-bd9d4 | 1/1 | Running | 0 | 8m30s |
| acstor-capacity-provisioner-5c97b6744d-bd9d4 | 1/1 | Running | 0 | 8m30s |
| acstor-capacity-provisioner-5c97b6744d-q95nd | 1/1 | Running | 0 | 8m30s |
| acstor-cert-manager-c97fc57d5-7pztx | 1/1 | Running | 0 | 8m31s |
| acstor-cert-manager-cainjector-544d688f8c-sk8ql | 1/1 | Running | 0 | 8m31s |
| acstor-cert-manager-webhook-76759c5f75-4z9hs | 1/1 | Running | 0 | 8m31s |
| acstor-csi-controller-74498c484c-g7zvq | 5/5 | Running | 0 | 8m31s |
| acstor-csi-controller-74498c484c-z2kgb | 5/5 | Running | 0 | 8m31s |
| acstor-csi-node-7pvrq | 2/2 | Running | 0 | 8m30s |
| acstor-csi-node-plhfd | 2/2 | Running | 0 | 8m30s |
| acstor-csi-node-tfhd6 | 2/2 | Running | 0 | 8m30s |
| acstor-dmesg-logger-6bm7j | 1/1 | Running | 0 | 8m31s |
| acstor-dmesg-logger-gwxtf | 1/1 | Running | 0 | 8m31s |
| acstor-dmesg-logger-z26w4 | 1/1 | Running | 0 | 8m31s |
| acstor-etcd-operator-7fb87f8f94-b86h4 | 1/1 | Running | 0 | 8m30s |
| acstor-io-engine-n4ml4 | 1/1 | Running | 0 | 8m30s |
| acstor-io-engine-qgtk6 | 1/1 | Running | 0 | 8m29s |
| acstor-io-engine-wnjkd | 1/1 | Running | 0 | 8m29s |
| acstor-kube-prometheus-sta-operator-759bdff856-cht8l | 1/1 | Running | 0 | 8m31s |
| acstor-metrics-exporter-5272g | 1/1 | Running | 0 | 8m30s |
| acstor-metrics-exporter-psh55 | 1/1 | Running | 0 | 8m30s |
| acstor-metrics-exporter-t7xp7 | 1/1 | Running | 0 | 8m30s |
| acstor-ndm-4n2r6 | 1/1 | Running | 0 | 8m31s |
| acstor-ndm-gq7qv | 1/1 | Running | 0 | 8m31s |
| acstor-ndm-operator-67985d5c5c-vt2jj | 1/1 | Running | 0 | 8m30s |
| acstor-ndm-xvfr6 | 1/1 | Running | 0 | 8m31s |
| acstor-operator-diskpool-cb5856547-kg2k2 | 1/1 | Running | 0 | 8m30s |
| acstor-prereq-f4x6l | 1/1 | Running | 0 | 8m31s |
| acstor-prereq-hkkrf | 1/1 | Running | 0 | 8m31s |
| acstor-prereq-r2z9h | 1/1 | Running | 0 | 8m31s |
| etcd-acstor-4hv7snw7qp | 1/1 | Running | 0 | 7m52s |
| etcd-acstor-backup-sidecar-7d95598d78-lvbbm | 1/1 | Running | 0 | 8m18s |
| etcd-acstor-pmjl2cc7kz | 1/1 | Running | 0 | 6m38s |
| etcd-acstor-s25fxs6smt | 1/1 | Running | 0 | 7m20s |
| prometheus-acstor-prometheus-0 | 2/2 | Running | 0 | 8m15s |
Step 4: Create the Storage Pool (YAML definition)
Use the following yaml definition to create the Storage Pool within your cluster.
acstor-storagepool.yaml
apiVersion: containerstorage.azure.com/v1
kind: StoragePool
metadata:
name: azuredisk
namespace: acstor
spec:
poolType:
azureDisk:
skuName: Standard_LRS
resources:
requests:
storage: 1Ti
$ kubectl get storagepools -n acstor
| NAME | CAPACITY | AVAILABLE | USED | RESERVED | READY | AGE |
| azuredisk | 1099511627776 | 1091278639104 | 8232988672 | 7696117760 | True | 1m |
Make sure the new Azure Container Storage Class has been created through kubectl get storageclasses
| NAME | PROVISIONER | RECLAIMPOLICY | VOLUMEBINDINGMODE | ALLOWVOLUMEEXPANSION | AGE |
| acstor-azuredisk | containerstorage.csi.azure.com | Delete | WaitForFirstConsumer | true | 2m |
| acstor-azuredisk-internal | disk.csi.azure.com | Retain | WaitForFirstConsumer | true | 43m |
| acstor-azuredisk-internal-azuredisk | disk.csi.azure.com | Retain | WaitForFirstConsumer | true | 24m |
| azurefile | file.csi.azure.com | Retain | Immediate | true | 61m |
| azurefile-csi | file.csi.azure.com | Retain | Immediate | true | 61m |
| azurefile-csi-premium | file.csi.azure.com | Retain | Immediate | true | 61m |
| azurefile-premium | file.csi.azure.com | Retain | Immediate | true | 61m |
| default (default) | file.csi.azure.com | Retain | WaitForFirstConsumer | true | 61m |
| managed | disk.csi.azure.com | Retain | WaitForFirstConsumer | true | 61m |
| managed-csi | disk.csi.azure.com | Retain | WaitForFirstConsumer | true | 61m |
| managed-csi-premium | disk.csi.azure.com | Retain | WaitForFirstConsumer | true | 61m |
| managed-premium | disk.csi.azure.com | Retain | WaitForFirstConsumer | true | 61m |
Restoring to the new cluster
Define a Restore Job in CloudCasa
Because you’ll need to create and configure a new cluster with ACStor, you will need to create your cluster before and register it into CloudCasa. From there you can execute a restore to the new cluster and change your storage classes in the restore options.
If you haven’t already done so, follow the previous steps in the doc to register an AKS cluster to CloudCasa.
Step 1: Selecting a Source Cluster to restore from
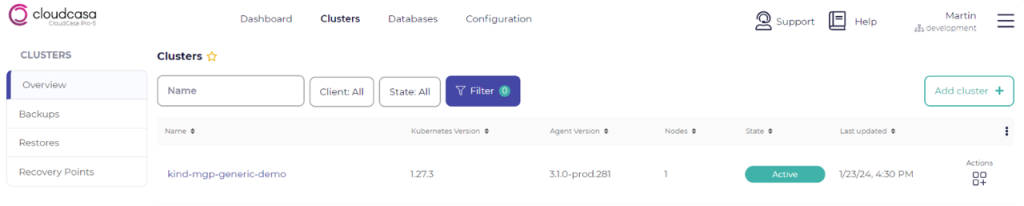
In the CloudCasa user interface, go to the Cluster > Overview section and ensure that your cluster is registered and marked in an “Active” state. Ensure that you have a backup from this cluster to restore from.
Step 2: Define a Restore Job
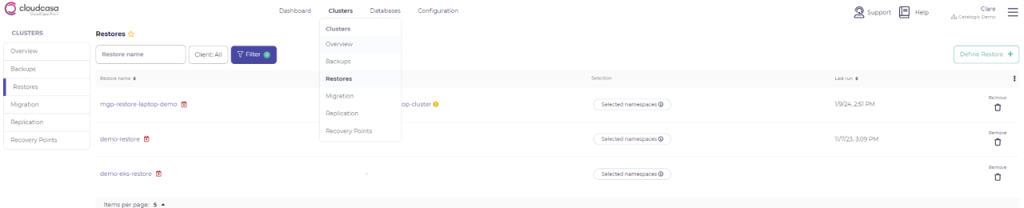
There are many screens from which you can define a migration within CloudCasa, by either clicking on the hyperlink to the cluster and going into the Clusters > Restores section and clicking on “Define Restore”.
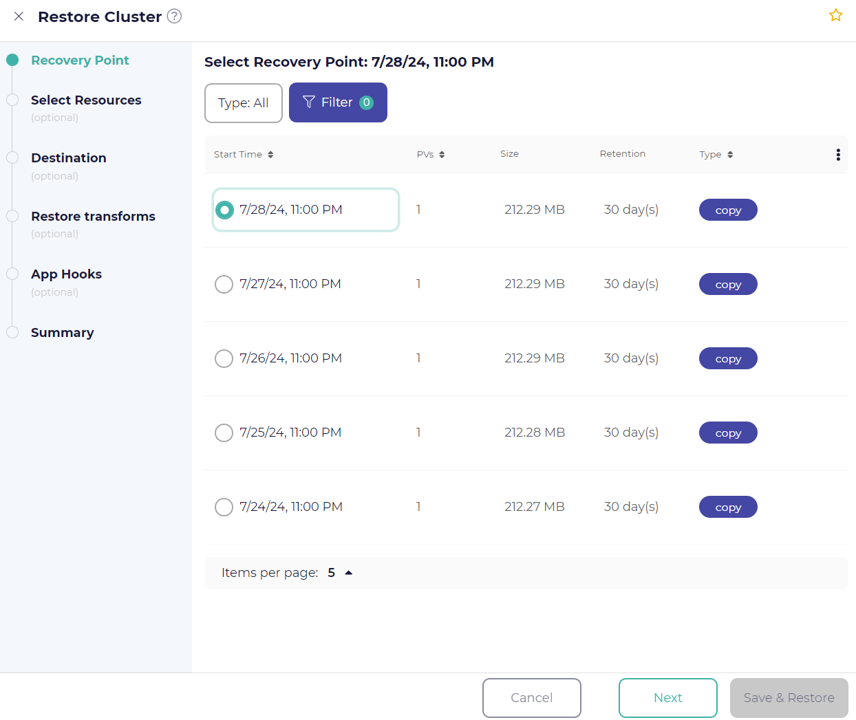
Step 3: Make selections for your restore source
In the Selections Panel, you’ll be able to select the cluster you want to restore along with the recovery point. You will need to backup your source cluster using a snapshot and copy operation to perform the restore to Azure Container Storage. The recovery point will list itself as being protected through a “Copy” operation.
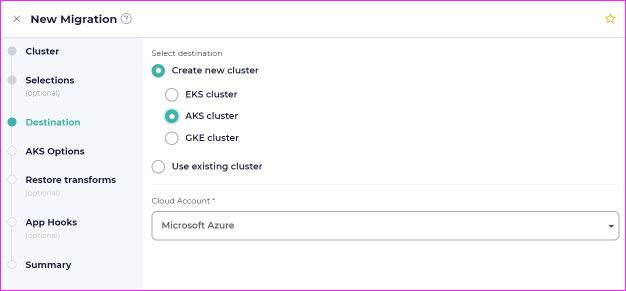
Step 4: Select a destination to cluster to restore to
In the next screen, you will be able to select your destination cluster using you created previously with Azure Container Storage.
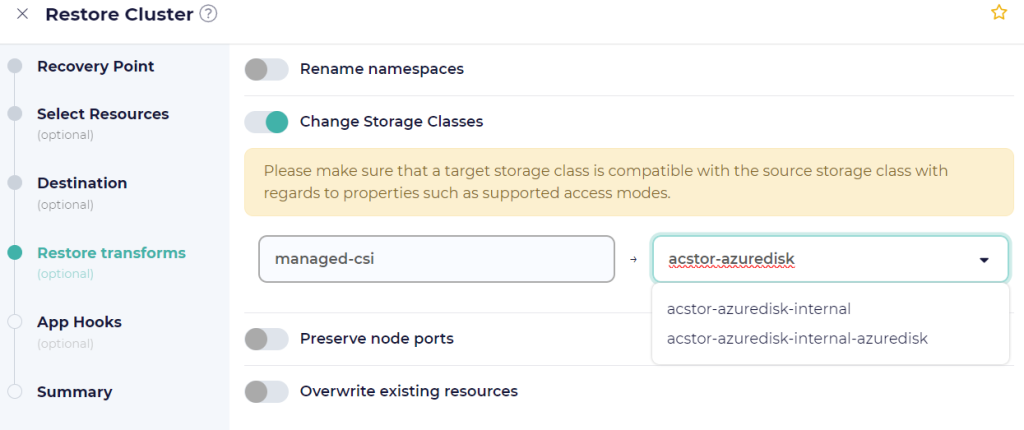
Step 5: Define Restore Transforms
It is here where you can remap your storage class from your original source cluster to Azure Container Storage. Select the appropriate storage class on the destination cluster to reflect the previously create acstor storage class.
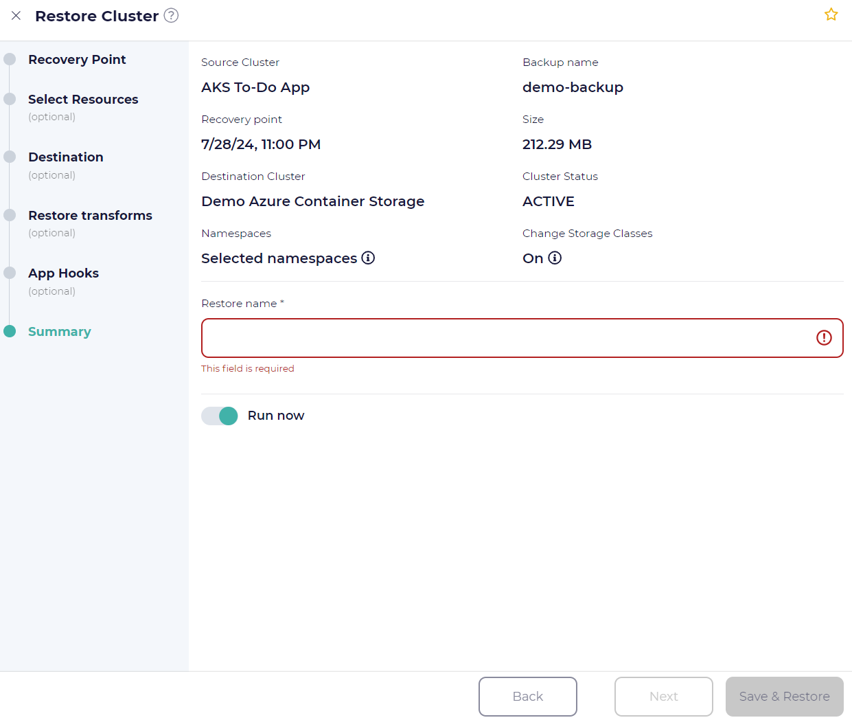
Step 6: Provide a restore job name and run
The last screen of the restore job wizard will ask you to provide a name and whether or not you would like to run the restore job now.
Conclusion
Migrating Kubernetes clusters to take advantage of the Azure Container Storage storage class can be a simple undertaking when using the right tools. Once a CloudCasa agent is installed on your source cluster, and a new destination cluster has been configured with the Azure Container Storage, it is just a matter of running a backup and restore of your Kubernetes cluster through CloudCasa.
CloudCasa allows you to choose many different parameters during restore, including remapping storage classes and other options. This flexibility is what allows CloudCasa to become the “easy” button for performing your migration. With CloudCasa, you can migrate and rebuild your cluster however and whenever you want.