Velero is an open-source backup and recovery tool designed specifically for Kubernetes clusters. It provides a straightforward way to protect your Kubernetes resources, including persistent volumes, namespaces, and custom resources, by taking backups and restoring them in case of data loss or disaster recovery scenarios. In this blog you will learn the different use cases for Velero and the two ways to install Velero, using the Velero CLI and using a Helm chart.
Use Cases for Open Source Velero
With Velero, you can easily create scheduled or ad-hoc backups of your entire cluster or specific resources. These backups capture the state of your applications and their associated data, allowing you to restore them to a previous state if needed. Velero supports both full and incremental backups, minimizing the storage space required for backups by only capturing changes since the last backup.
In addition to backups, Velero supports cluster migration and replication. It simplifies the process of moving applications and data from one Kubernetes cluster to another by taking consistent snapshots of resources and restoring them in the target cluster. This capability is particularly useful when migrating applications between development, staging, and production environments.
Velero supports a variety of storage providers, including cloud object storage services like Amazon S3, Google Cloud Storage, and Microsoft Azure Blob Storage. This allows you to store your backups in a reliable and scalable manner, leveraging the storage infrastructure provided by these cloud providers.
2 Ways to Install Velero (Including the Velero Helm Chart)
Velero is a backup and restore tool for Kubernetes clusters. There are two ways to install Velero:
1. Using the Velero CLI:
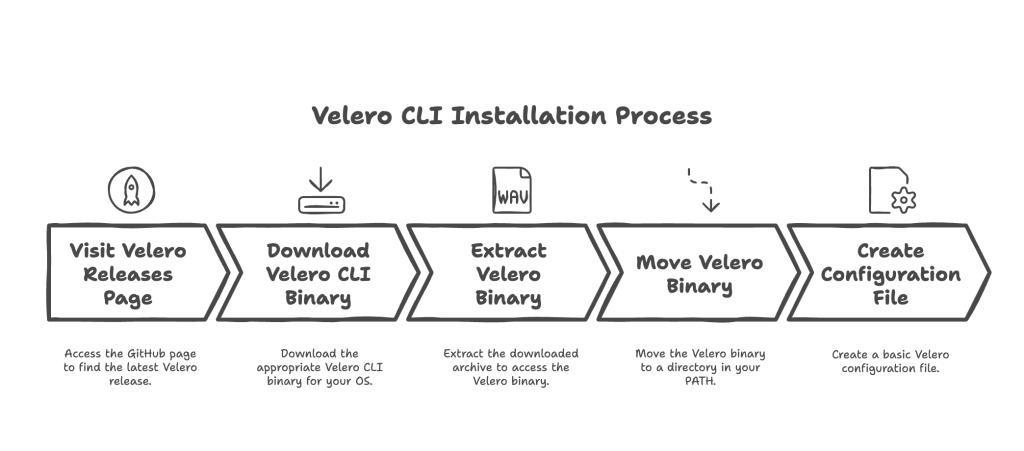
- Visit the Velero releases page on GitHub (Releases · vmware-tanzu/velero ) and find the latest release.
- Download the appropriate Velero CLI binary for your operating system (e.g., velero-vX.X.X-linux-amd64.tar.gz for Linux).
- Extract the downloaded archive to get the Velero binary.
- Move the Velero binary to a directory in your system’s PATH (e.g., /usr/local/bin) to make it accessible from anywhere.
- Create a Velero configuration file. You can start with a basic configuration by running:
velero install --provider <PROVIDER_NAME> --bucket <BUCKET_NAME> --secret-file ./credentials-velero
Note: –secret-file ./credentials-velero specifies a file containing credentials for your cloud provider. Make sure to replace it with the appropriate path to your credentials file. Replace <PROVIDER_NAME> with the name of your cloud provider (e.g., aws, azure) and <BUCKET_NAME> with the name of the storage bucket where you want to store backups. Customize the configuration file as needed. You may want to modify parameters such as storage location, backup retention policy, etc. Refer to the Velero documentation for more information on available options.
- Run the following command to install Velero:
velero install --config <CONFIG_FILE_PATH>
Note: Replace <CONFIG_FILE_PATH> with the path to your Velero configuration file.
- Verify the installation: Check if Velero has been successfully installed by running:
velero version
2. Using a Helm chart
- Ensure you have Helm installed on your system. If you haven’t installed Helm yet, you can follow the official Helm installation guide: Helm | Installing Helm
- Add the Velero Helm repository to your local Helm configuration:
helm repo add vmware-tanzu https://vmware-tanzu.github.io/helm-charts
- Update your local Helm repositories:
helm repo update
- Create a values file to customize the Velero installation. You can create a file named velero-values.yaml and modify it according to your requirements. Here’s an example of a basic configuration:
image:
   repository: vmware-tanzu/velero
   tag: v1.6.3
configuration:
provider: aws # Replace with your cloud provider name
backupStorageLocation:
name: default
bucket: my-bucket # Replace with your storage bucket name
config:
region: my-region # Replace with your cloud provider region
- Install Velero using Helm:
helm install velero vmware-tanzu/velero --values velero-values.yaml --namespace velero
Note: This command will install Velero with the provided values file in the velero namespace. Make sure to replace velero-values.yaml with the path to your actual values file.
- Run the following command to check the status of the Velero installation, you should see Velero pods running and ready:
kubectl get pods -n velero
Install Velero to Enhance the Resilience of your Kubernetes Environment
In conclusion, Velero is a powerful and versatile backup and recovery tool for Kubernetes clusters. Whether you install Velero using the Velero CLI or deploy it with the Velero Helm chart, you can take advantage of simplified data protection, disaster recovery, flexible backup options, incremental backups, and cluster migration and replication.
By leveraging Velero, you can enhance the resilience and manageability of your Kubernetes environment, ensuring the safety and availability of your applications and data. Check out our blog on important resources you can utilize when using Velero.
Velero Support Services
While Velero is the most battle tested option for Kubernetes backup and recovery, as your company moves applications into production and you have compliance requirements and service levels to meet, you might need support for Velero. CloudCasa for Velero provides standard business Velero support services. This gives you direct access to our technical team of experts to get your questions answered and provides help with troubleshooting to quickly identify and resolve Velero issues.
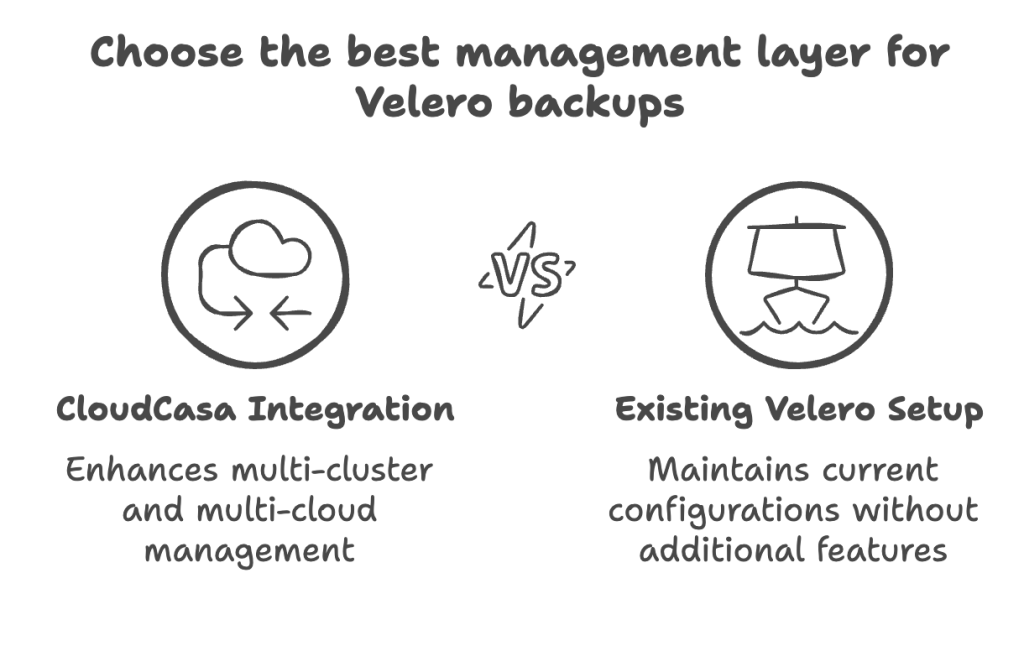
You also get to leverage CloudCasa for Velero as the management layer for Velero. It allows all users of the popular open-source Kubernetes backup tool to take advantage of CloudCasa’s multi-cluster and multi-cloud management capabilities for their Velero backups without interfering with your existing Velero configurations. Sign up today for the CloudCasa for Velero plan to streamline your Velero management and gain access to comprehensive Velero support.

