Overview
CloudCasa by Catalogic can be installed on Azure Kubernetes Service (AKS) clusters using Ubuntu and perform migrations to Azure Linux as the host operating system.
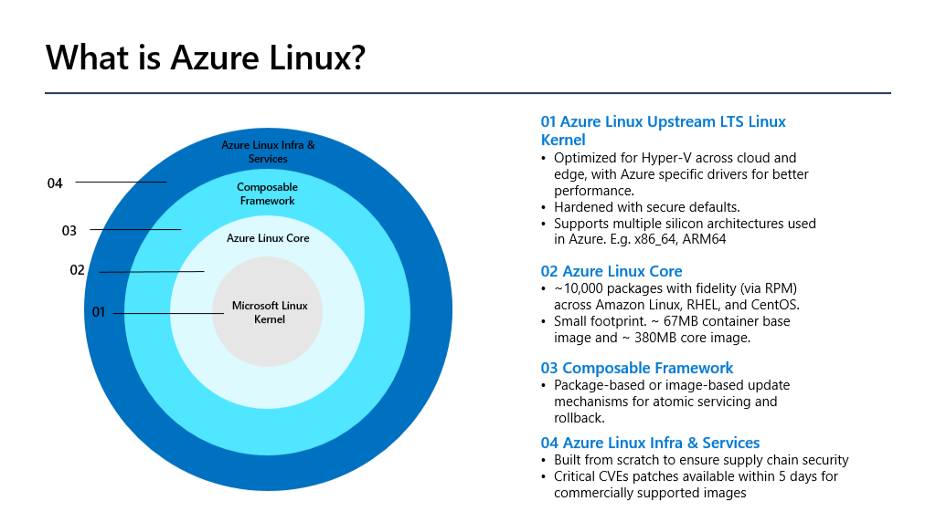
In this tutorial you will learn how to:
- Install CloudCasa on Azure Kubernetes Service clusters
- Backup AKS clusters and Persistent Volumes with CloudCasa
- Perform restore(s) to migrate your existing clusters from Ubuntu to Azure Linux
Registering Microsoft Cloud Accounts in CloudCasa
In the first step, you will need to add a Microsoft Cloud Account into CloudCasa profile. If you haven’t already done so, you will need to create a CloudCasa account profile at https://cloudcasa.io.
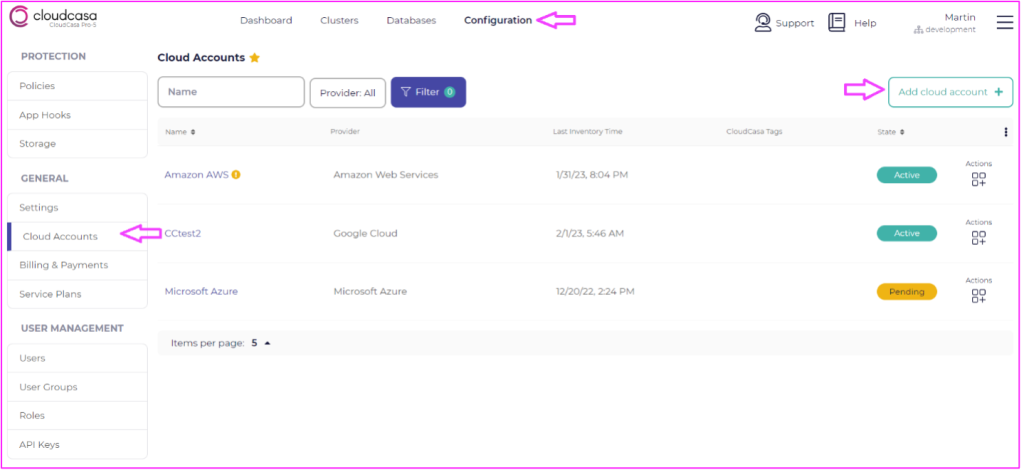
Step 1: Add a new cloud account to CloudCasa
From the Configuration > Cloud Accounts menu, click on the Add Cloud account button.
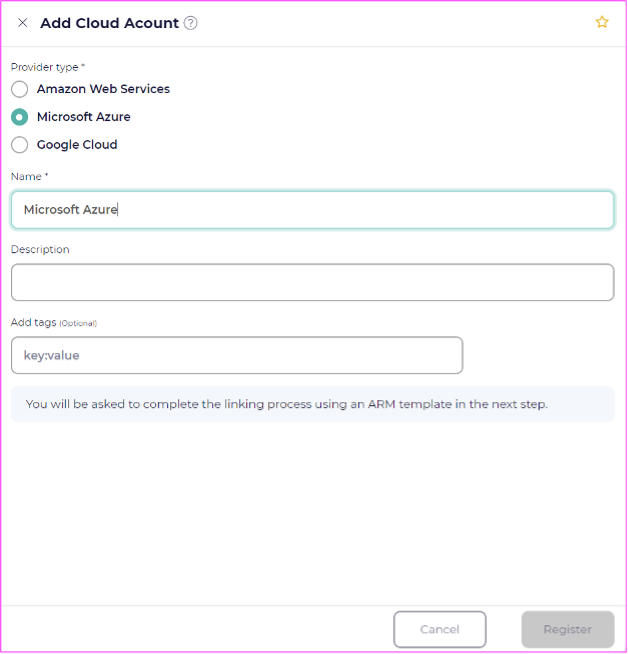
Step 2: Select Microsoft Azure as the cloud account type
In the “Add Cloud Account” menu, select Microsoft Azure as the cloud account services
Step 3: Deploy the CloudCasa ARM template to your Azure cloud account
Click the “Deploy to Azure” link. This will take you to the Create ARM Template (Azure Resource Manager) wizard. Click the Deploy to Azure button.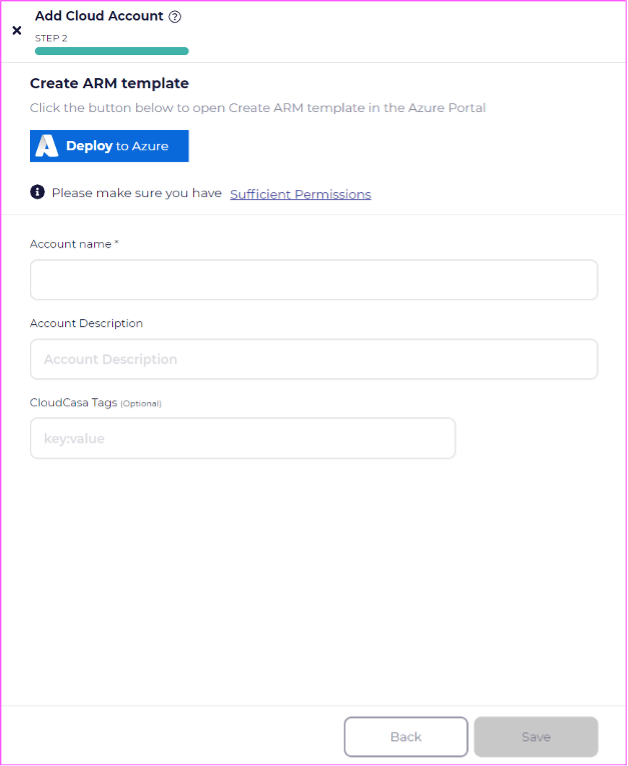
Step 4: Follow the custom deployment wizard
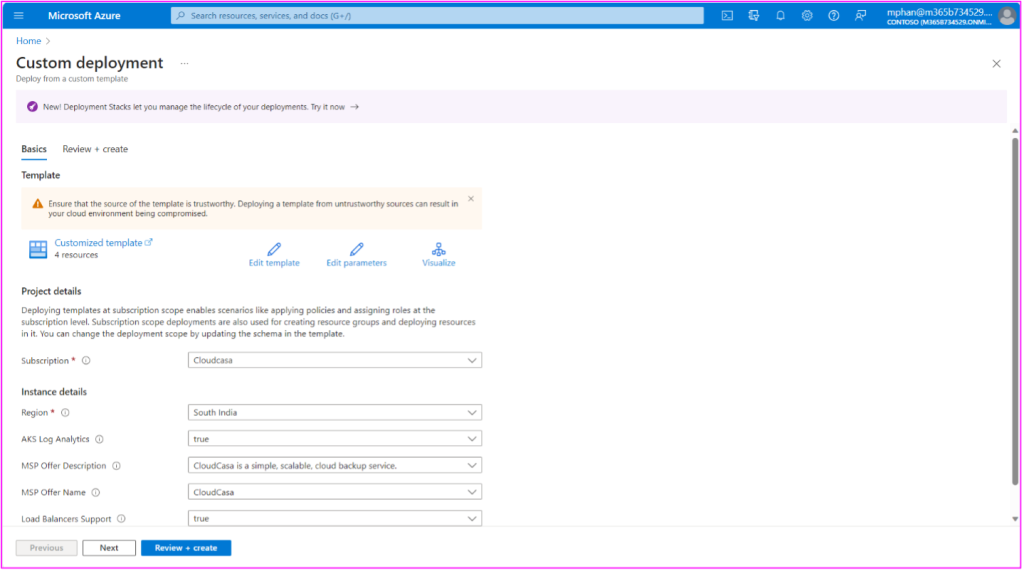
The link will take you to the Create Template wizard within the Microsoft Azure portal. It is here where you can deploy our custom template, by providing this information when configuring the template:
Subscription: CloudCasa
Region: <select applicable region>
You can leave the default options listed in the template. Click the “Review + Create” button.
Step 5: Create the CloudCasa application from the custom template
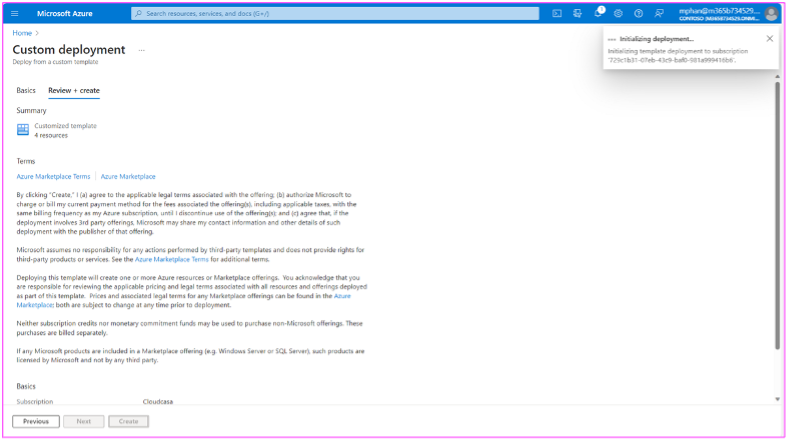
After clicking on the Review + Create Button, you will be provided with a description of the CloudCasa custom template along with end user terms of agreement. Agree to the Azure MarketPlace Terms and click the Create button within this screen.
Verifying CloudCasa Connectivity with Azure
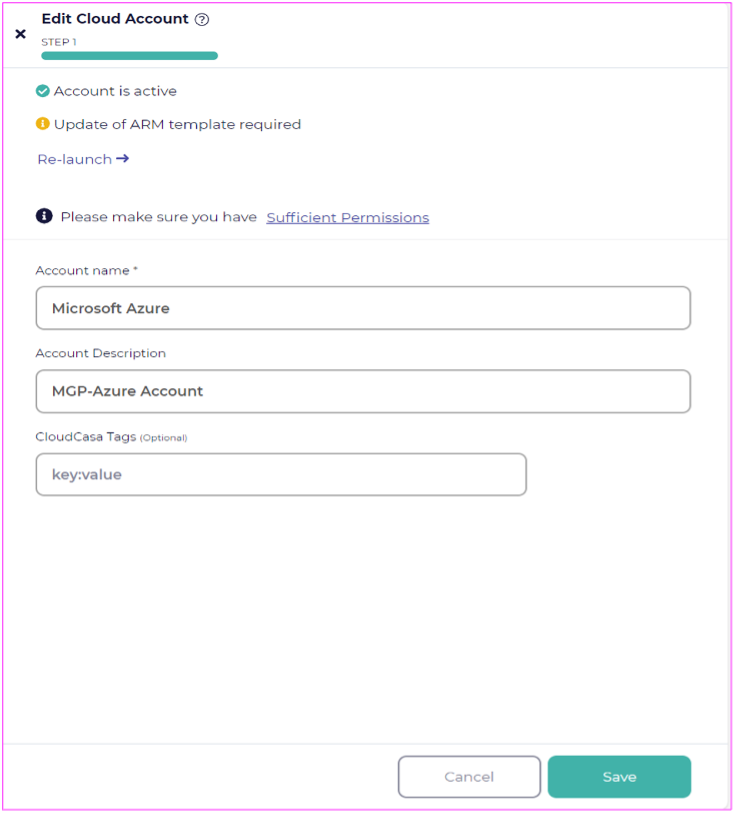
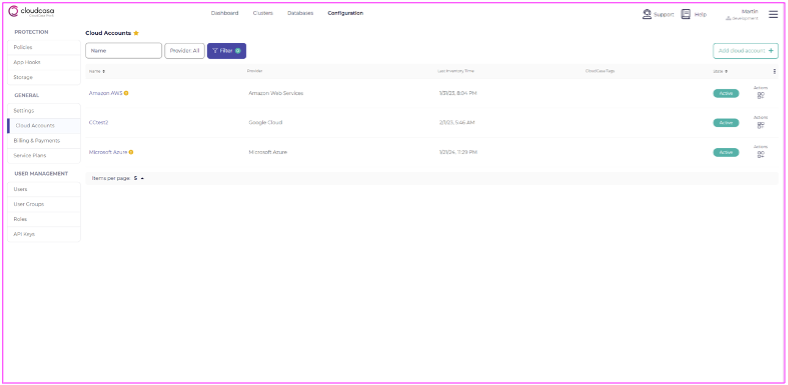
After deploying the custom template through the Azure Resource Manager template screen, you will see your Account be marked as Active. In the CloudCasa management console, you can provide your Cloud Account with a Name and Description as shown in the example screenshot below.
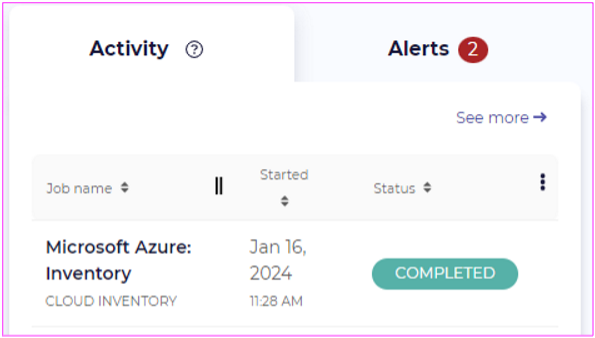
Upon clicking the save button, an inventory job will be created and run automatically.
Installing CloudCasa Agent in your AKS Cluster
CloudCasa by Catalogic can be installed on Azure Kubernetes Service (AKS) clusters using Ubuntu and perform migrations to Azure Linux as the host operating system.Step 1: Verify you can see AKS clusters in your Azure cloud account
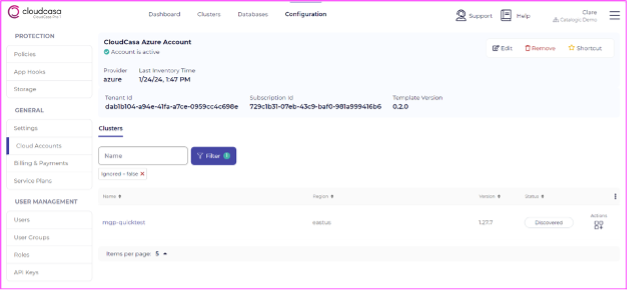
When clicking on the hyperlink for your Cloud Account name, you will be able to see the AKS clusters accessible for your Azure cloud account.
Step 2: Choose a cluster to install the CloudCasa agent
On the cluster which you would like to deploy an agent, click on the Actions menu on. From the actions menu, select “Install”.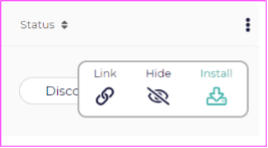
Step 3:Verify the CloudCasa agent has been installed and is active
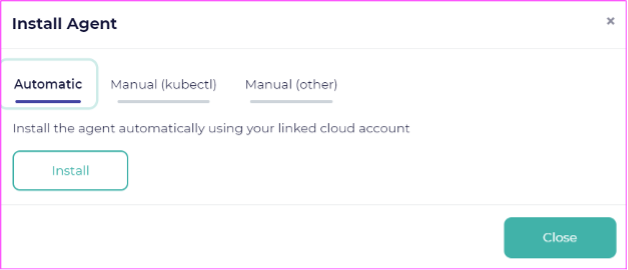
Install using the preferred method of your choice (Automatic is the easiest and will push out an agent for you). Once the installation is completed, your cluster should move from a Discovered state to an Active state.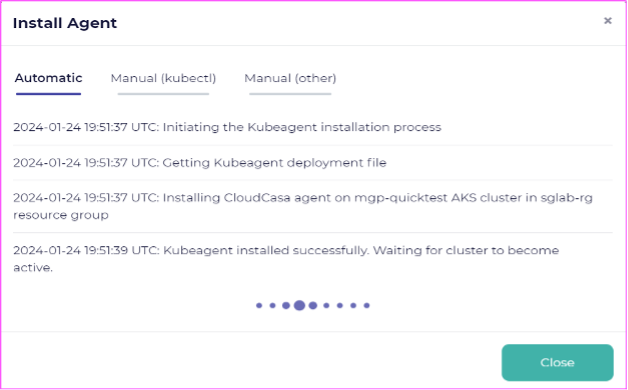

Note: If you are only performing migrations into your Azure Cloud Account, then there will be no need to install any agents. You will only need to register your Azure Cloud account. Once your Azure account is registered, you will be able to perform Full Stack Recovery (create an AKS cluster on-the fly during your restore) to the registered Azure account.
Migrating Clusters Through Backup and Restore
Defining a Backup Job in CloudCasa
Step 1: Verify the CloudCasa agent installed in your cluster is active
In the CloudCasa user interface, go to the Cluster > Overview section and ensure that your cluster is registered and marked in an Active state.

Step 2: Define a backup job for your cluster
There are many screens from which you can define a backup within CloudCasa, by either clicking on the hyperlink to the cluster and going into the Backup section and clicking “Define Backup”.
Step 3: Select the cluster you want to backup
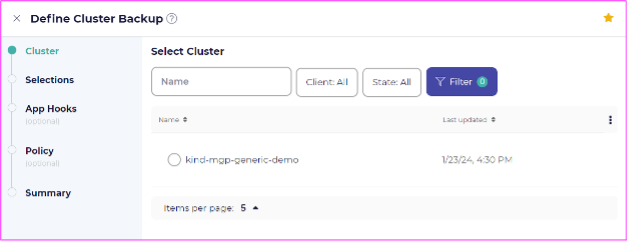
Step 4: Make selections for your backup source
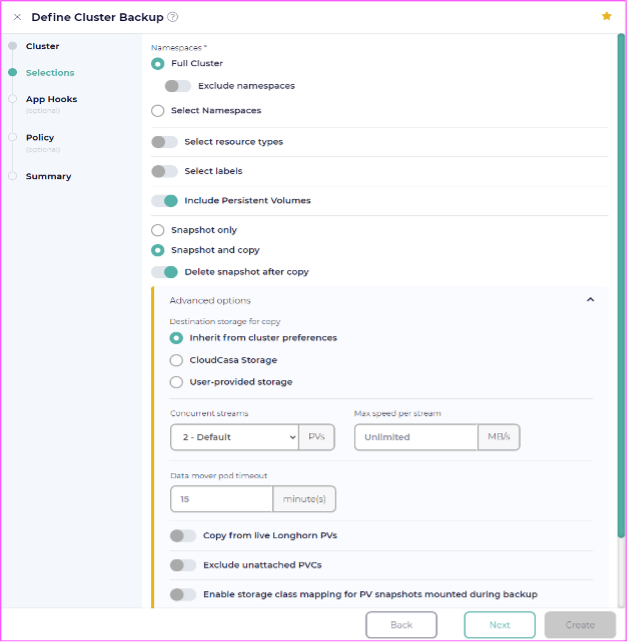
In the Selections Panel, you’ll be able to select to backup the Full Cluster (while excluding namespaces) or select individual namespaces that you would like to backup and protect. But the important piece here is that in order to perform the migration, you will need to perform a “Snapshot and Copy” operation for restoring to an alternate or a new cluster created from a Full Stack Recovery. Make sure that the Snapshot and Copy operation is selected.
The storage destination that you select in your backup job definition will also need to be reachable from the Microsoft Azure Kubernetes Services as well. Once you have your backup selections selected, proceed to the next screen.
Step 5 (optional): Configure App Hooks
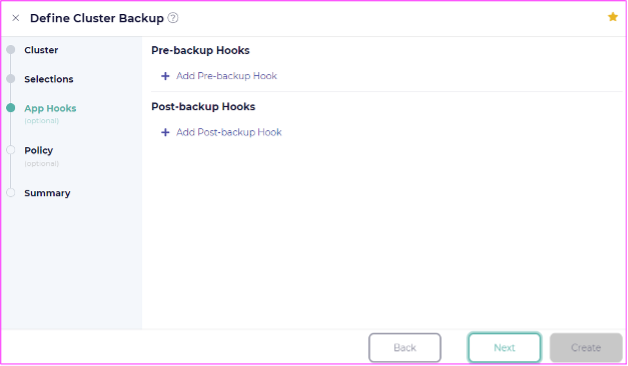
Pre and post application hooks allow users to run a script before and after the storage snapshot takes place. This is especially useful if you are using non-CSI capable storage for your persistent volumes. In these cases, CloudCasa uses a file system backup method instead a snapshot based backup.
CloudCasa has predefined application hook templates for common cloud native databases such as MongoDB, Postgres, and MySQL.
Step 6 (optional): Assign a Backup Policy
The next screen will have you associating a schedule to the backup job. It is entirely optional if you would like to schedule this backup, but if you’re just running the backup once for your migration, you can simply run the job once you’ve completed defining the backup job.
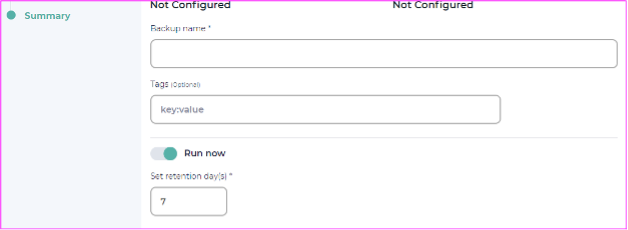
Step 7: Provide a name for your backup job and run
The last step in defining the backup job is to simply provide your job with a name. If you would like to run the backup job immediately after it has been created, simply select the Run Now option at the bottom of the screen. You will also need to provide a retention period for how long you would like CloudCasa to keep the snapshot for.
Defining a Restore Job in CloudCasa
After completing your backup / copy job operation, you can now use that snapshot to perform a Full Stack Recovery. While doing a Full Stack Recovery, you are able to define and customize the parameters of how you would like your cluster to be created within AKS. This includes selecting which version of Kubernetes, defining your cluster configuration and selecting the distribution of Linux you would like your new cluster to be created with.Did You Know: Full Stack Recovery allows for provisioning the cluster directly on the fly. Users can use Full Stack Recovery to migrate clusters from on-prem to managed Azure Kubernetes Services among other supported Cloud Accounts.
Step 1: Navigate to the Clusters > Restores menu in CloudCasa
Step 2: Click on the Define Restore button.
Step 3: Select the cluster you had backed up that you would like to Restore
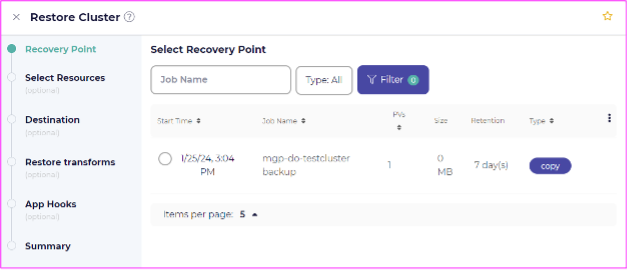
Step 4: Select the Recovery Point
Step 5: Select the namespace to recover
Select the namespace that you would like to Restore from the list of available namespaces within the cluster. Alternatively, you can select “All Protected Namespaces” in order to restore the full Kubernetes cluster as a whole into AKS.
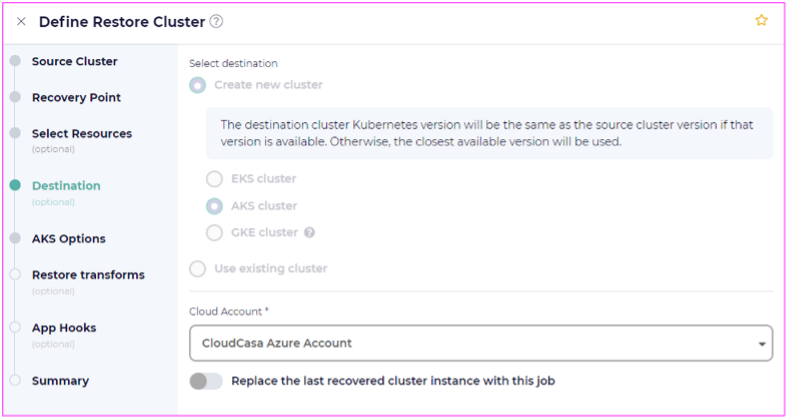
Step 6: Select the destination cluster for your recovery
In the Destination section, here is where the options you select will allow you to transform the original source cluster into the Destination Cluster that you would like to build. Here is where you will define the parameter destinations for the cluster, including:
- Choosing the version of Kubernetes
- Choosing the Cloud Account destination where you want to restore the Kubernetes application to
Step 7: Supply the AKS Options for Location and Credentials
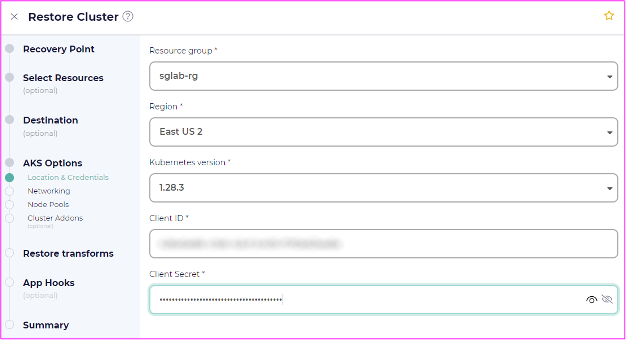
Here you will supply:
- Resource Group Name available from a drop down menu
- Region
- Kubernetes Version
- Client ID and Client Secret
Step 8: Define additional cluster transformations you want to apply.
Here you can customize the elements of your node pool including:
- Size of node pool
- OS SKU (Ubuntu or Azure Linux distribution with which to build your Kubernetes cluster)
- Size of VM node
- Minimum, maximum, and desired node size of the cluster
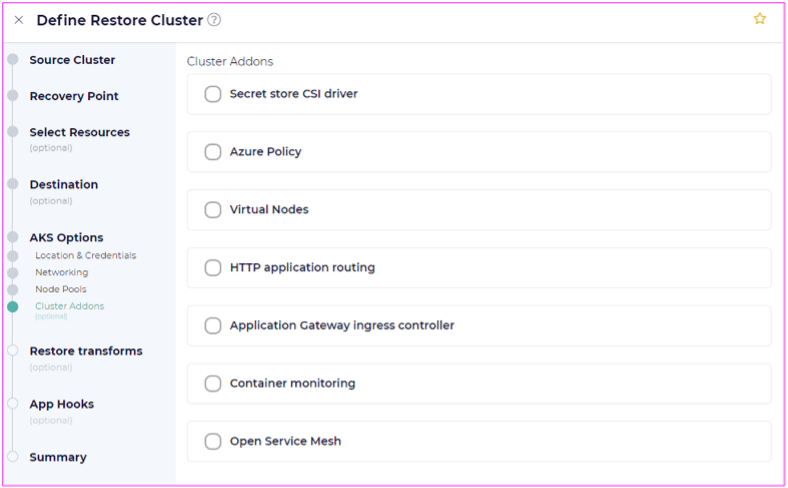
Step 9 (Optional): Define additional Cluster Add-Ons

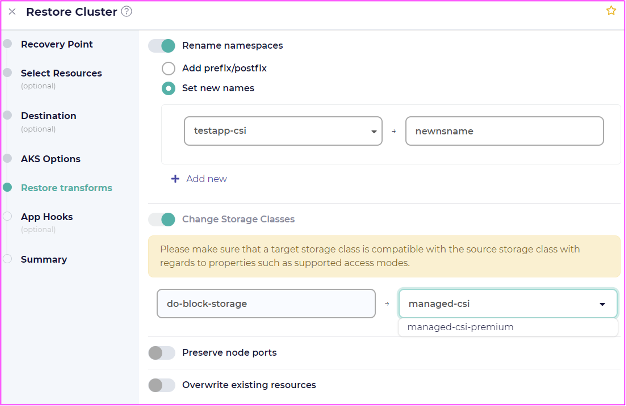
Step 10 (Optional): Final Steps, Restore Transforms and Application Hooks
Restore transformations allow you to rename namespaces either by appending a prefix or suffix to the original namespace name. You will also be able to remap storage classes of your persistent volume claims here as well. In doing so, clusters that may have originated from an Amazon EKS cluster using EBS or EFS storage class can be remapped to Azure disk or Azure Container Storage as an example.
Step 11: New Cluster Creation
Upon completion of defining your restore / migration job, you will be able to see your cluster being created through the Azure Portal.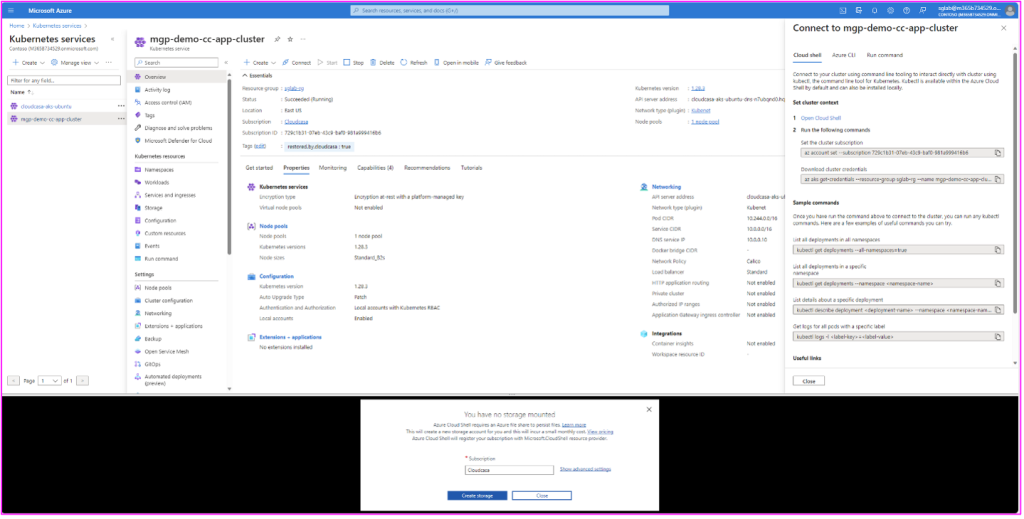
Conclusion
The migration of an AKS cluster from Ubuntu Linux to Azure Linux can be a simple undertaking when using the right tools. Once a CloudCasa agent is installed on your source cluster, the migration itself can be done by performing a backup of your cluster (and persistent volumes) through CloudCasa, and then performing a restore. CloudCasa’s full stack recovery can create an entirely new cluster from scratch using the defined parameters of your choice.
CloudCasa allows you to choose many different parameters during restore, including OS SKU, Kubernetes version, etc. This flexibility is what allows CloudCasa to become the “easy” button for performing your migration. With CloudCasa, you can migrate and rebuild your cluster however and whenever you want.
After the migration, you need to consider what to do with your old cluster that is running on Ubuntu nodes. We’ll leave that decision up to you, but you can either stop the cluster or delete it entirely.
Migrating AKS Clusters to Azure Linux Using CloudCasa Demo
This video demonstrates migrating Azure Kubernetes Service (AKS) clusters to Azure Linux. Please watch it to learn more.