Google Cloud Provider (GCP) Filestore is a good place to keep lots of rich, unstructured data, such as graphic designs, video editing files, and other media workflows that use files as input and output. Having GCP Filestore backups enables users to protect themselves against the rare case of inaccessibility, accidental changes, ransomware attacks, or other types of disasters. For those using GCP FileStore as Persistent Volumes on GKE (Google Kubernetes Engine) clusters, they can now back up, restore and migrate them using CloudCasa.
In this blog we cover how to backup GCP Filestore and recover Kubernetes Persistent Volume data for pods deployed in GKE clusters.
What is GCP FileStore and why do we need GCP Filestore backups?
The GCP Filestores are fully managed Network File System (NFS) volumes on GCP for use with Google Compute Engine and GKE instances. They provide simple, fast, consistent, scalable, and easy to use network-attached storage.
Filestore meets the needs of the most demanding applications storing mission critical data. That’s why it is important to have these Kubernetes Persistent Volume backups. A few common use cases for GCP filestore backups are:
- Protection against any accidental changes
- Migration of the namespaces or data to another cluster because after you create a Filestore instance, you cannot change its location or service tier
- Development and testing purpose
CloudCasa is an ideal solution to easily manage GCP Filestore backup and disaster recovery policies for your Kubernetes PVs in GKE with these quick and easy steps.
Creating a GCP Filestore Instance
Filestore CSI driver is the primary way to use Filestore instances with GKE because it provides a complete data management experience like use of volume snapshots and volume expansion to allows users to resize a volume’s capacity.
For provisioning you can also use existing Filestore instances by using pre-provisioned Filestore instances in Kubernetes workloads, or you can dynamically create Filestore instances and use them in Kubernetes workloads with a Storage Class or a Deployment.
In this example we have provisioned the filestore using the Filestore CSI driver.
Task to be performed on GKE Cluster
Ensure you have enabled the following on the GKE cluster:
- Cloud Filestore API
- Filestore CSI driver
To access a volume using the Filestore CSI driver, the following three steps must be performed on the cluster:
- Create StorageClass
Storage Classes are used for provisioning Filestore instances. Ensure the Storage Class uses the Filestore CSI driver by adding “filestore.csi.storage.gke.io” in the provisioner field. The below steps are performed under a namespace “gkefs”.
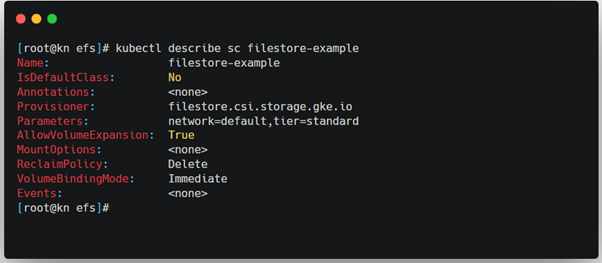
2. Use a PersistentVolumeClaim to access the volume
Create a PersistentVolumeClaim resource that references the Storage class created in Step1.
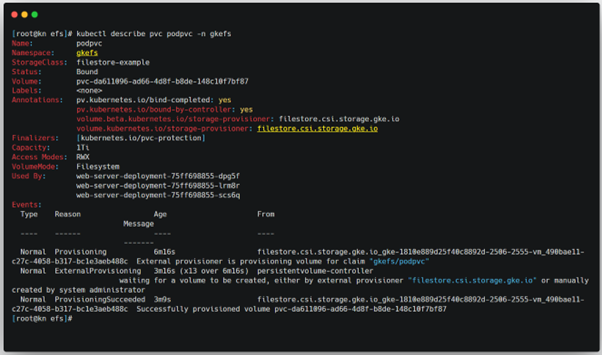
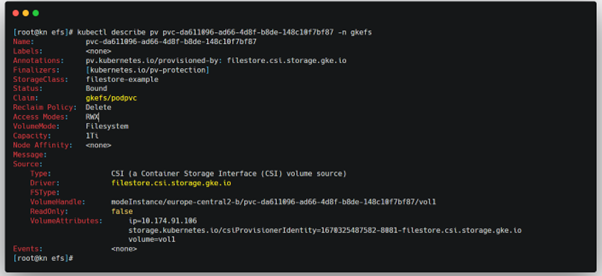
3. Create a deployment that consumes the volume
Create a web-server deployment which consumes the PV resource that was created.

GCP Filestore Backup on GKE Cluster
Now for configuring a backup of your new Filestore PV. In the CloudCasa UI, we create a backup job selecting the namespace “gkefs” and execute the job. If the user chooses to perform a copy action for the namespace, which will back up the data to external object storage, it can be selected in CloudCasa by choosing the “Snapchat and Copy” option when defining the backup job.
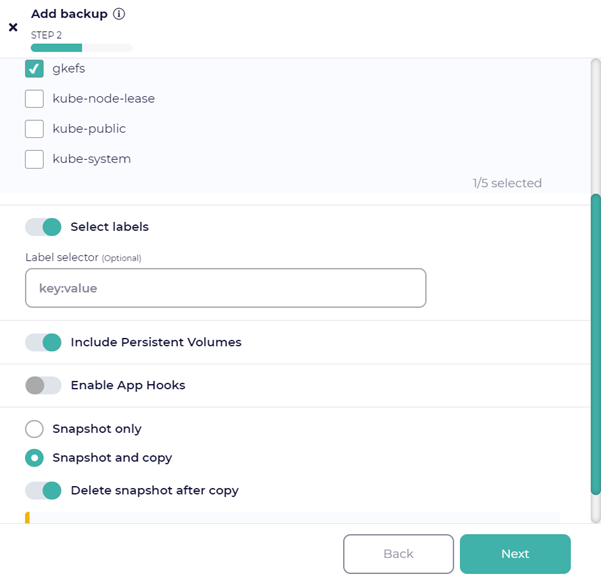
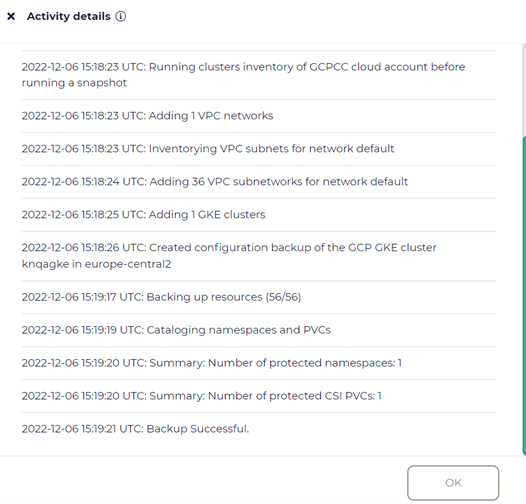
On completion of the GCP Filestore backup job, one can view the “Activity tab” for additional details regarding the job.
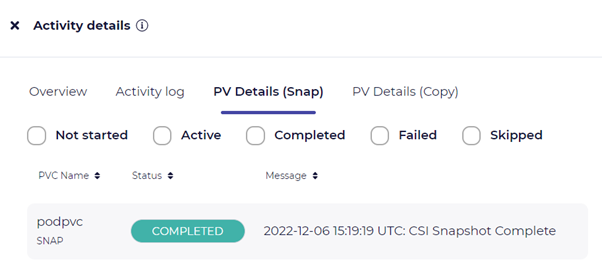
The below screenshot shows the list of the backed-up Persistent volumes after a backup job has been executed.
Restore of Kubernetes Persistent Volume Backup on GKE cluster
Now that we have a backup that includes the GCP Filestore PV, the next step is to perform a restore. In this blog, we will demonstrate 2 ways of restoring.
Restore Operation 1
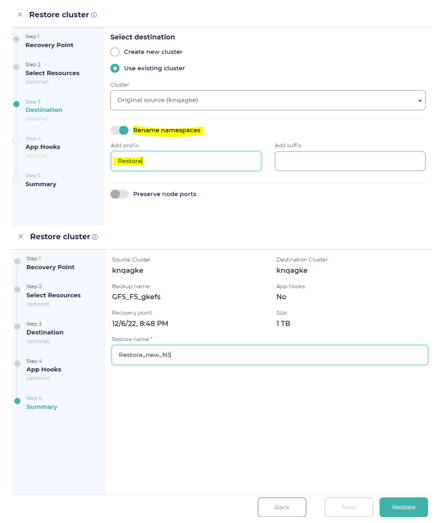
The following steps walk you through defining a restore job to restore the backed-up namespace to a new namespace (remember that we backed up the gkefs namespace).

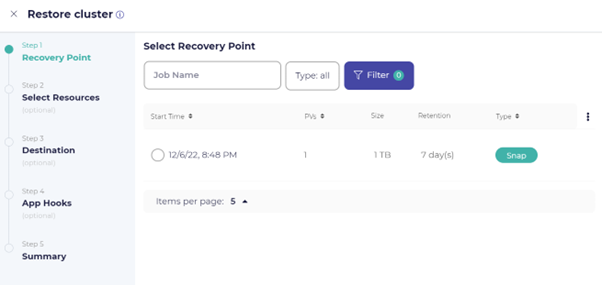
In the CloudCasa UI, choose the Restore option and then select the Recovery Point created from the backup taken earlier.
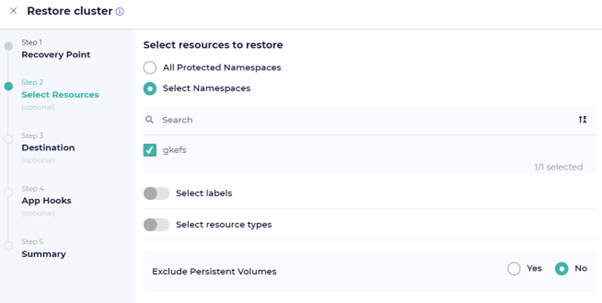
Choose the option to “Rename namespaces” in your restore job. A user can then add a prefix or a suffix to rename the restored namespace.
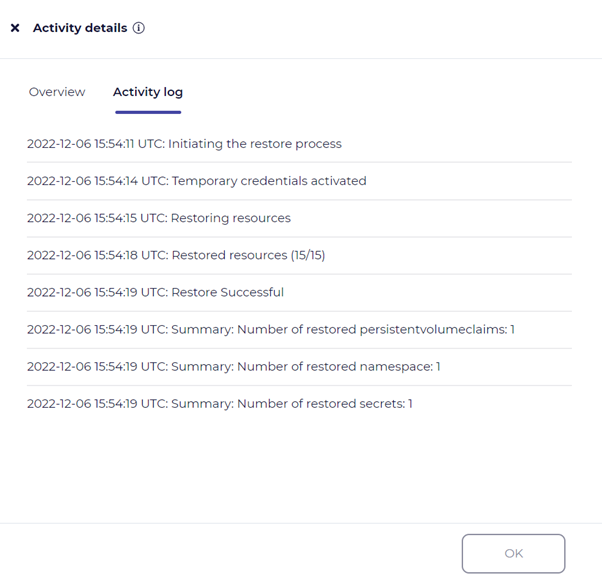
Once the restore job is executed the “Activity log” tab displays the execution logs and status as follows:
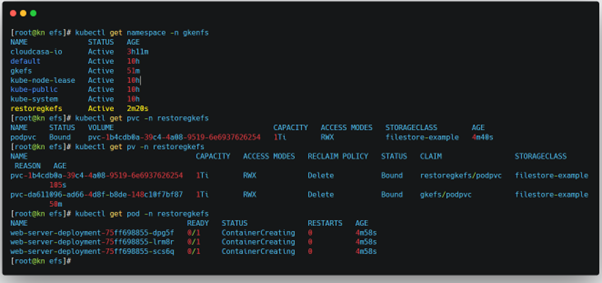
Users can also see the new restored namespace with the PVC, PV and the Pod in the GKE cluster using the kubectl CLI as shown in Figure 13.
Restore Operation 2
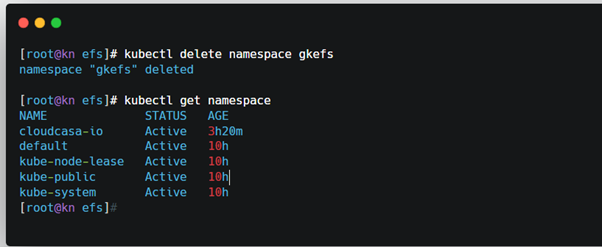
CloudCasa also supports disaster recovery of a GCP Filestore, when the namespace and its components get deleted. For example, if the namespace “gkefs” is deleted from the cluster as shown in Figure 12, the Restore operation for the deleted namespace can be performed with similar steps as described above.
Define the restore job, by select the appropriate recovery point and select the namespace(s) to be recovered. In the Destination section do not select “Rename namespace” option. Then save and run the job.
Once the restore is successfully executed, the user can validate the namespace and its components on the GKE cluster. The below screenshot (Figure 15) shows the deleted namespace “gkefs” has been restored with all its components.
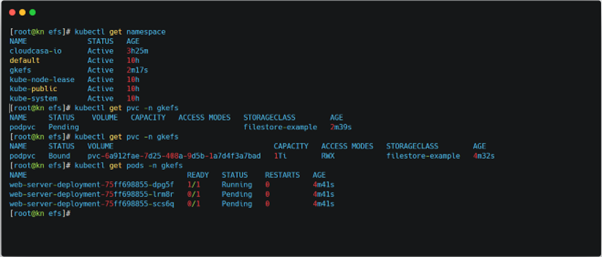
Note that it might take a while for Filestore instances to complete provisioning. Before that, deployments will not report a READY status. You can check the progress by monitoring your PVC status. You should see the PVC reach a BOUND status when the volume provisioning is complete.
It’s important to note that you can also automatically create a new cluster by performing a restore from a copy backup in either the same or in a different cloud.
And that is how easy it is to use CloudCasa to manage data protection and disaster recovery for GKE and GCP Filestore persistent volumes!
Learn more about the GCP Filestore Backup with CloudCasa by Catalogic.
You can try the free service plan for CloudCasa, no strings attached. We’d be happy to connect with you over a call and talk through your issues in Kubernetes Persistent Volume backup for GCP Filestore. If you want to see a custom demonstration or just have a chat with us, feel free to get in contact via casa@cloudcasa.io.