Protecting MySQL Databases on Kubernetes: Backup and Restore Strategies
MySQL database is one of the most popular open-source relational database management systems, and it is a top choice for some of the world’s favorite websites and web applications including YouTube, Twitter, and WordPress. Handling so much data and protecting it is incredibly important to organizations. Having a MySQL database backup and recovery allows the recovery of the information from an earlier point in time after a loss of data, and it also helps to meet your company’s compliance and governance requirements. Application consistent database backups are critical in case of natural disasters, accidental deletion, overwriting, data theft or any other type of data loss.
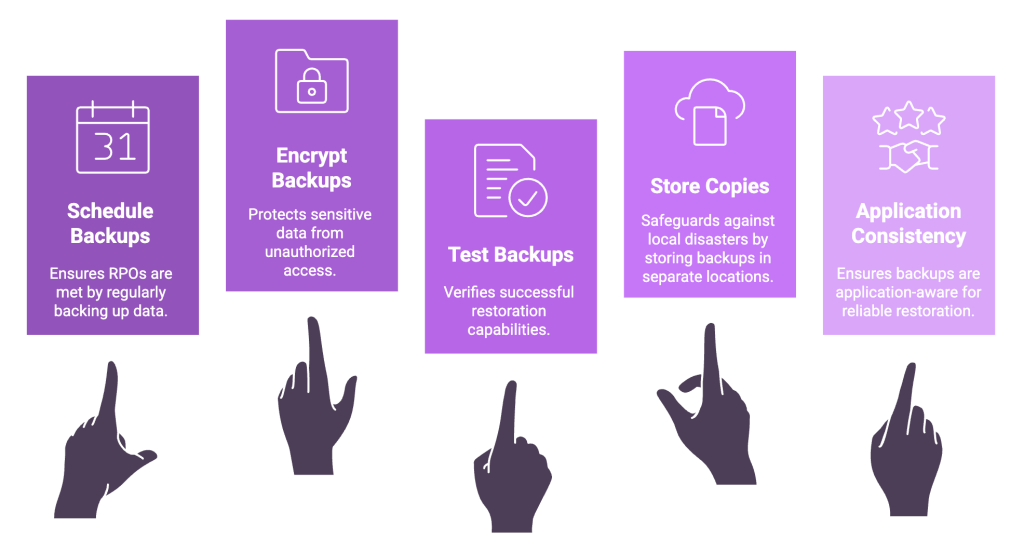
Here are some of the best practices to consider for MySQL backups for Kubernetes environments:
- Regularly schedule Kubernetes backups to ensure your recovery point objectives (RPOs) are met.
- Encrypt your backup files to protect sensitive data and tamper-proof them against unauthorized deletion or modification with Object Lock or an API lock mechanism.
- Test your MySQL backups regularly to ensure that they can be restored successfully.
- Store copies of your MySQL Kubernetes backups in a separate location, such as in a different availability zone or region, to protect against local disasters.
- Ensure you have application consistent MySQL backups by using a backup solution that is application aware.

In this article, we will outline the use of App Hooks for creating and restoring application consistent MySQL database snapshots and backups to protect your MySQL databases on Kubernetes environments.
Using App Hooks for Creating MySQL Backups for Kubernetes
Application hooks are a feature of CloudCasa that allows users to execute custom code at specific points in the Kubernetes backup and restore process. This can be useful for performing additional actions that are not supported out-of-the-box by CloudCasa, such as backing up non-Kubernetes resources or integrating with other tools and services. In our case, we will leverage it for taking an application consistent snapshot of a MySQL database. The application hooks are executed at various milestones within a backup job: pre-backup, post-backup, post-restore.
When performing a backup, you can specify one or more commands to execute in a container in a pod when that pod is being backed up. The commands can be configured to run before PVs are backed up (“pre” hooks), or after PVs are backed up (“post” hooks).
Consider the scenario where we need to back up the MySQL data. During the MySQL database backup process, say, we do not want any write operation in our database. So, what we can do is define a pre-backup App hook that will automatically freeze write operations and a post-backup App hook will resume write operations in the MySQL database.
This is a simple example to help you understand the utility and importance of App Hooks. In CloudCasa, using App hooks is very simple with the use of pre-built templates, and customizing them to your needs hardly requires any effort.
Creating a MySQL Database Backup
Let us check out how to use App Hooks in CloudCasa while creating a MySQL backup!
- Setting up a MySQL database server in Kubernetes environment
Here you will create a Deployment that will manage a Pod running a container of a MySQL docker image, then you will create a Service that will permit access to the pod. This pod will request storage (using a Persistent Volume Claim) to a storage resource (Persistent Volume).- Build a Persistent Volume (PV)
- Build a Persistent Volume Claim (PVC)
- MySQL pod’s deployment
Note: We will be using MiniKube for this demo, but any managed kubernetes services such as AKS, EKS, and GKE could also be utilized for this MySQL backup example.
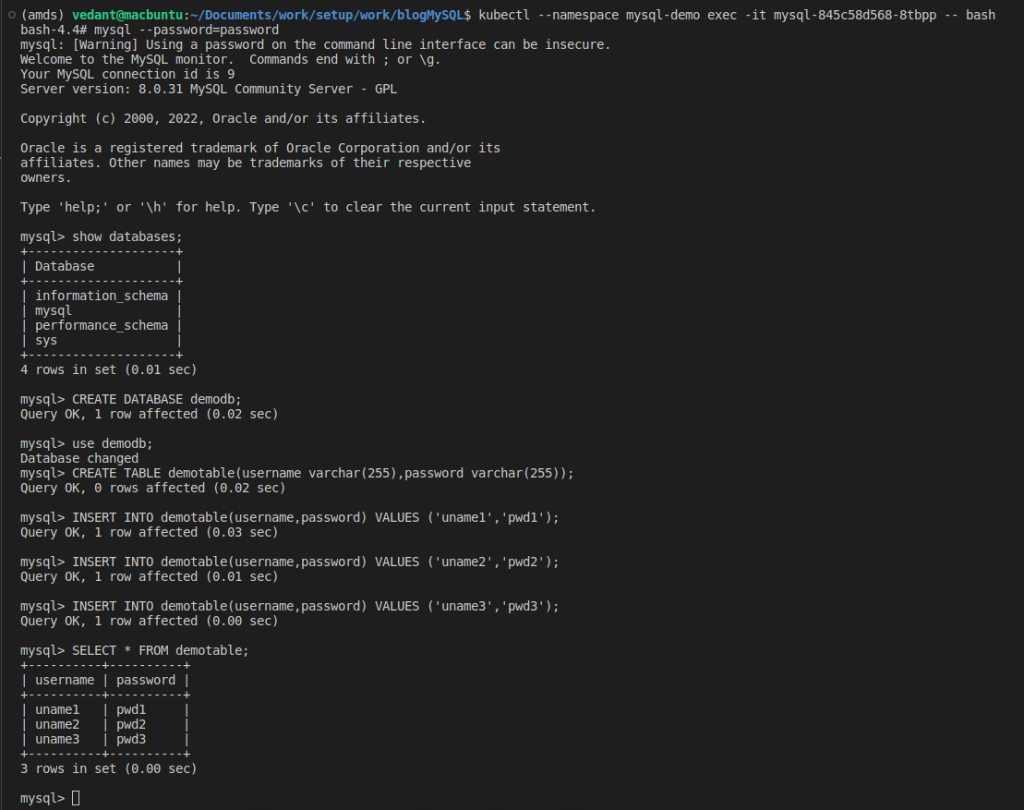
The following screenshot outlines our MySQL Database setup

2. Configuring CloudCasa.io
- Register your cluster on CloudCasa.io by going to the Configuration/Clusters page. Click on “Add Cluster”, fill in the required fields and click on “Register”.
- Install the CloudCasa cluster agent using the kubectl command from the popup – or using Helm or any other supported method.
3. Add custom App Hooks using pre-built templates.
a. Click on “App Hooks” from the left panel of the Configuration menu.

b. Click on “Add App Hook”.
c. From the “Template” dropdown, choose the appropriate template based on the application type and the app hook type. Here, as we are using a MySQL database and are configuring a pre-backup hook, we’ll choose mysql-pre-backup-system-hook. Note that the app hook type “Pre-backup” is selected automatically.
The template supplies the proper command to flush and lock the database so that CloudCasa can obtain an application consistent snapshot at backup time. In this case, the command is “FLUSH TABLES WITH READ LOCK”. All write access to tables will be blocked and all tables will be marked as ‘properly closed’ on disk while CloudCasa takes a snapshot of the persistent volume.
You can edit the hook command if you wish. For example, to prove to yourself that the hook command is being executed, you could change it to “/bin/bash -c echo hello > processLogs.txt”. This echo command creates a file in the Linux system.
**Fun Fact: 96.3% of the world’s top one million servers run on Linux. Only 1.9% use Windows, and 1.8% – FreeBSD. (Source: Web Tribunal)
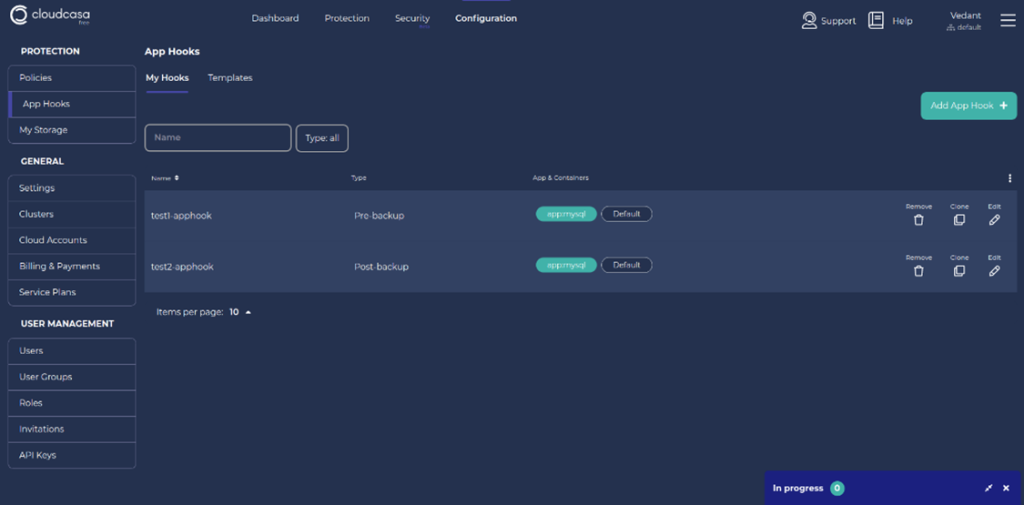
d. Next specify the Pod Selector and (optionally) Container for the hook. These define which pod(s) the hook will apply to and which container the hooks command(s) will run in. Labels are used to identify the pod(s) where the command will be executed. If multiple labels are specified, they all must match the pod’s labels. The command(s) will be executed on all matching pods. If the container name is not supplied, the first container in the pod will be used. The template sets these to “app=mysql” and “Default” (empty) respectively. These will work for this MySQL database example but may need to be edited for other configurations.
Enter a suitable name for the MySQL database App Hook and then save it.

4. Create a post-backup hook that will unlock the MySQL database tables after a PV snapshot has been taken by CloudCasa. Follow the same steps as above, but choose the template mysql-post-backup-system-hook.
Taking a MySQL Backup with App Hooks
Let’s define a Kubernetes backup with App Hooks included.
a. Move to the Dashboard and click on “Define Backup”.
b. Enter a backup name, choose the cluster, and click on “Next”
c. Choose either the full cluster or some specific namespaces, and toggle on the “Enable App Hooks” and “Include Persistent Volumes” options.
d. Add the Pre and Post App Hooks you defined above as shown below.

e. Click on Next and again click on Next.
f. Enter the retention days as per your need, toggle Run Now on and click on “Create”.
5. Tracking Backup Status
a. You can track the Backup Activity in the Activity Panel of the Dashboard.
b. You will be able to get the activity details and logs by clicking on the Job name.

e. That’s it. We have now got a successful backup! Also you can find the processLogs.txt file in your environment.
Simulating MySQL Data Loss
As summarized before, there are several common causes of data loss with MySQL database on Kubernetes. These include power failures, hardware failures, and software bugs. Other potential causes of data loss include user errors, such as accidentally deleting important data, and security breaches, such as hacking attacks.
In our example, let’s delete some rows from the table to demonstrate a data loss event:

As we can see, we no longer have the row (uname1, pwd1) in our table. Let’s try to restore the lost data.
Restoring Data from the MySQL Backup
-
-
- On the Dashboard, find the MySQL backup Job you just created. Click on the Restore button.
- Choose the Recovery Point from the panel. Click on Next.
-

3. Select Namespace and click Next.

4. We can also create a new cluster or namespace with the restore.
To create a new namespace, click on ‘Rename namespaces’, add a preferred prefix/suffix and Click Next and Next.

5. Provide a Job name for the restore and click on Restore.

6. You can track the restore progress in the Activity panel in the dashboard.

7. Let’s check if we have our deleted data back.
Note: As we had chosen to restore the data in a new namespace, we need to track down the new namespace first.

8. We can see from the above screenshot that we have the deleted rows back with us from the MySQL backup.
Take a Victory Lap
We just saw how easy and straightforward it is to do a MySQL backup and restore to protect your Kubernetes database using CloudCasa. This is just a fraction of what CloudCasa does.

Indeed, CloudCasa is a powerful and easy-to-use Kubernetes backup service for DevOps, Platform Engineering, and IT Ops teams, that is fully integrated with Azure Kubernetes Service (AKS), Amazon EKS (Elastic Kubernetes Service), and Google Kubernetes Engine (GKE), as well as supporting all other major distributions and managed services and provides several amazing features like auto-scaling and multi-cloud Kubernetes backup and Any2Cloud recovery.
Sign up for the free service plan and give it a try! If you are self-hosting Velero, try CloudCasa for Velero!